Programme basique pour commander un servomoteur
À voir aussi
Programme basique pour commander un servomoteur
/*
PROGRAMME BASIQUE POUR COMMANDER UN SERVOMOTEUR
FONCTIONNEMENT
Au démarrage du microcontrôleur, le servo est mit à l’angle “servoMin”
Lorsqu’on appuie sur le bouton le servo tourne jusqu’à l’angle “servoMax”
Pour que le servo revienne à l’angle “servoMin”, il faut au choix :
- Relâcher le bouton
- Attendre le timeout “dTmax”
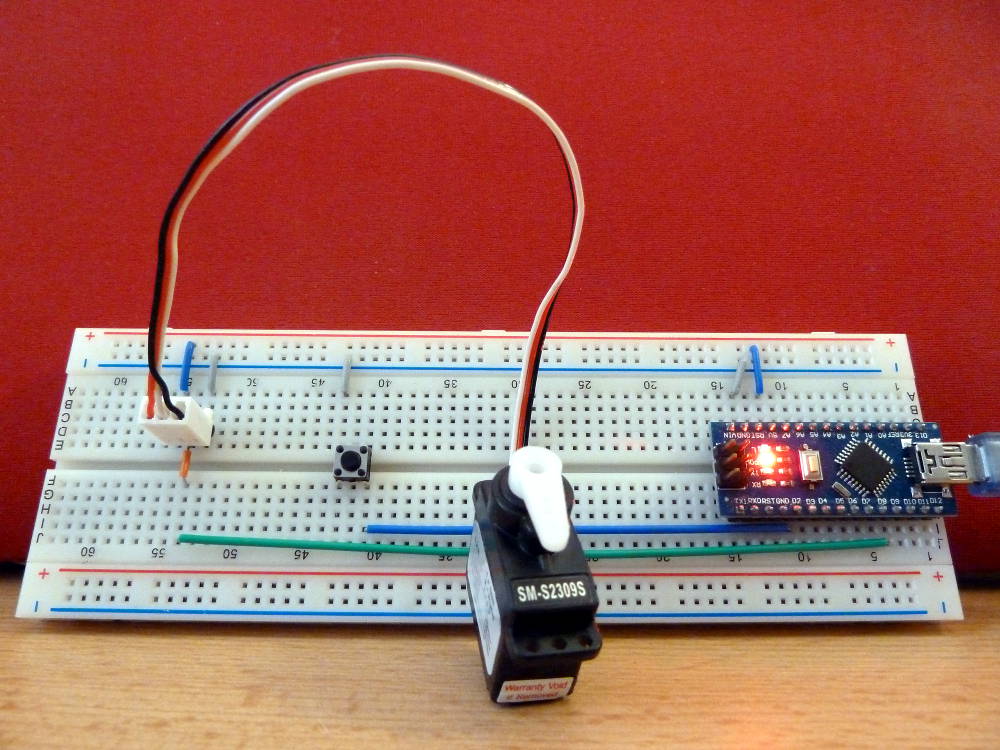
CONNEXIONS
SIGNAL SERVO D9
BOUTON D2
MICROCONTRÔLEUR
Clone Arduino Nano
SERVOMOTEUR
SM-S2309S
Rotation : ±60°
Speed @4.8V : 0.11 s/60°
Speed @6V : 0.09 s/60°
juin 2016, ouilogique.com
*/
#include <Servo.h>
Servo myservo;
const int bBtn1 = PORTD2;
const int bLed13 = PORTB5;
// servo
// ⇒ min = 0
// ⇒ max = 169
const byte servoMin = 0;
const byte servoMax = 90;
long T1;
const long dTmax = 4000;
#define btn1Read ! bitRead( PIND, bBtn1 )
#define led13Set bitSet( PORTB, bLed13 )
#define led13Clear bitClear( PORTB, bLed13 )
void setup()
{
bitSet( DDRD, bBtn1 );
bitSet( PORTD, bBtn1 );
bitSet( DDRB, bLed13 );
clignoteLed13();
myservo.attach( 9 );
myservo.write( servoMin );
}
void loop()
{
if( btn1Read )
{
T1 = millis();
led13Set;
myservo.write( servoMax );
_delay_ms( 500 );
while( btn1Read )
{
if( ( millis() - T1 ) > dTmax )
{
myservo.write( servoMin );
clignoteLed13();
}
}
led13Clear;
myservo.write( servoMin );
_delay_ms( 500 );
}
}
void clignoteLed13()
{
for( int i = 0; i < 10; ++i )
{
led13Set;
_delay_ms( 30 );
led13Clear;
_delay_ms( 60 );
}
}© ouilogique.com